Showing posts with label crafts. Show all posts

Tuesday, October 18, 2011

Tutorial Tuesday - Glowing Spider Decorations by Peacebabybatik

I think this is a perfect tutorial to post for this week with Halloween is just around the corner!  My girls and I went and got the supplies yesterday, and we are going to make them after school tomorrow.  Fun! Thanks Peace, Baby! Batik

Glowing Spider Decorations


A few weeks ago, little guy and I were wandering around a big-box home improvement store looking at their Halloween decorations. We became enamored with some tinsel spiders, but they were too pricey (in my opinion) to buy too many of them.
So, we decided to make our own spiders, an idea that fit well with my husband’s plan to go all out for Halloween this year.
Any by all out, I mean, all out. Our house is going to be something else this year! I can’t wait to see it all put together. We’ve got lights and ghosts and pumpkins, of course. But, that’s not enough. Oh no — he’s got a fog machine and built a contraption to cool the fog so it settles on the ground, and he is rigging up some electronic wizardry to make it look like thunder and lightning.
Don’t let me forget about the black lights, which is where these little guys come in.

Here’s what you need:
  • Styrofoam balls in whatever size you choose
  • Paint (we used neon orange, neon yellow and black)
  • Pipe cleaners
  • Googly eyes
  • Hot glue gun

Paint the spiders your desired color(s). If you’re lighting them with a black light, go for neon colors so they glow.
The balls need more than one coat to completely cover the Styrofoam. Let the paint dry completely between coats. Little guy had limited patience for so much painting, so I added the later coats on my own.

When the balls are dry, cut pipe cleaners in half for legs. Poke them into the Styrofoam and then bend them to look like legs with feet. Before we hang ours outside, I am going to go back and glue in the legs so they don’t fall out.
Cut another pipe cleaner in half and twist it into a loop. Poke it into the top of your spider to make a hole. Remove the loop, and fill the hole with hot glue. Poke the loop back in.

Glue on googly eyes, and find a great place to hang them.

Happy Halloween!

Tuesday, September 20, 2011

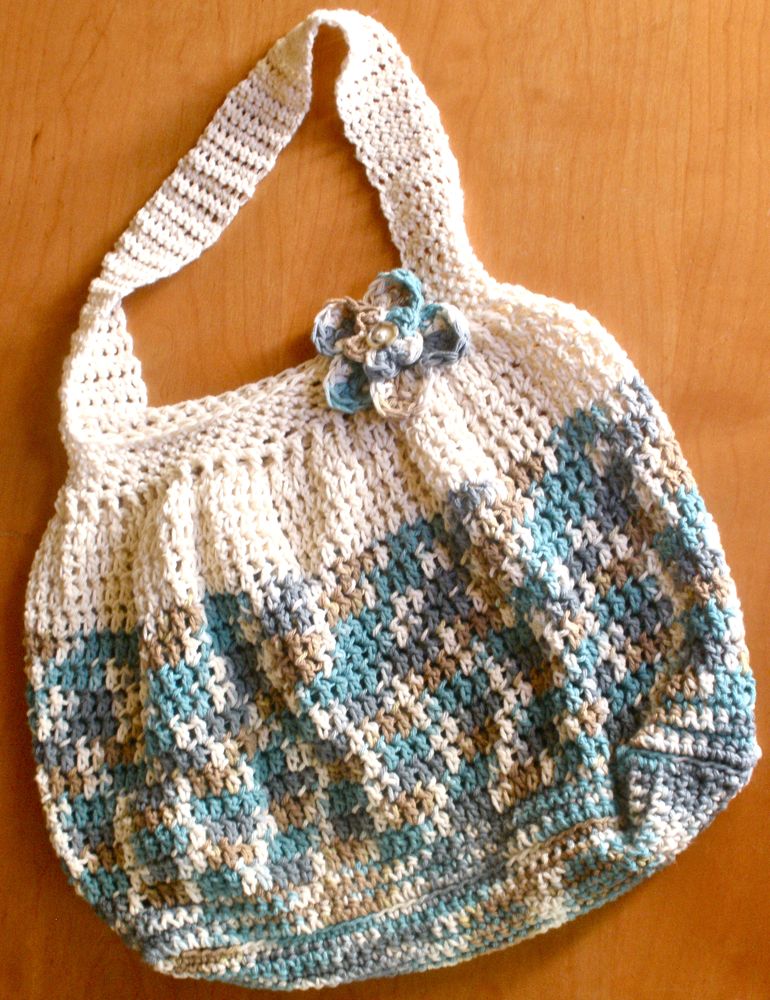
Tutorial Tuesdays: Crochet Hobo Bag

Today's tutorial comes to us from Sarah at Sarahndipities....

The HOBO BAG!


I really love that way it turned out!


Material Needed:
Size K crochet hook
A bunch of Cotton yarn (I used a large skein of Bernat Handicrafters, and one skein of Lily Sugar and Cream...sorryI didn't take the time to keep track of the amounts!)
Tapestry or yarn needle
Scissors

Abbreviations:
sp = space
st(s) = stitch(es)
beg = beginning
sk = skip
sc = single crochet
dc = double crochet
dctog = dc together (a decrease st)
sl st = slip stitch

Pattern is written in Standard American Terms
***NOTE***
This pattern has NOT been tested...so if you find any errors, feel free to leave suggestions in the comments below!

Crochet Hobo Bag

Ch 41.
Row 1:  Sc in 2nd ch from hook. Sc in each ch across. (40 sts)
Row 2 - 12:  Ch 1, turn.  Sc in each sc across.
Row 13:  Ch 1.  Do NOT turn.  Working along end, work 12 sc evenly.  At corner ch 1, sc in same sp.  Working along beginning edge, work 40 sc evenly to end.  At corner ch 1, sc in same sp.  Working along end, work 12 sc evenly.  At corner ch 1, sc in same sp.  Working along next edge, sc 40 evenly to beg.  Join with sl st to first sc.
Row 14:  Ch 1. Working in back loops only, sl st around, chaining 1 in each corner.  Join with sl st to beg ch.  This creates the rectangular base of the bag.


Base of bag


Row 15:  Ch 1, turn.  *Sc in next 40 sts.  Sk corner.  Sc in next 12 sl st.  Sk corner.*  Rep from * to * one more time.  Join with sl st to beg sc.
Row 16 - 18:  Ch 1, turn.  Sc in each sc around. Join with sl st to beg.
Row 19:  DO NOT TURN.  Ch 3, dc in next 11 sc.  Sk next sc.  Dc in next 38 sc.  Sk next sc.  Dc in next 12 sc.  Sk next sc.  Dc in next 38 sc. Sk last sc.  Join with sl st to beg ch.  DO NOT TURN.
Row 20 - 34:  Ch 3, DO NOT TURN.  Dc in next dc, and in each dc around.  Join with sl st to beg ch. 
Row 35:  Ch 3, DO NOT TURN.  *Dctog over next 2 sts.* Rep from * to * around.  Join with sl st to beg ch.
Row 36 - 40:  Ch 1, DO NOT TURN.  Sc in same st.  Sc in each st around. Join to beg with sl st.


For Strap:


Row 1:  Sl st in next 6 st.  Ch 1, sc in next 8 sts.  Ch 1, turn.
Row 2 - 50 (Or however long you want the strap to be!):  Sc in each sc across, Ch 1, turn. On last row, fasten off, leaving a long tail of yarn.
Using needle, st strap to opposite side of bag with whip st.  Fasten off, weave in ends.


NOTE:  The base of my bag measures about 14.5" x 4" and it's about 14" tall, not including the strap.  I switched color on my bag on row 29 to add some contrast.  I also added a simple crochet flower as an accent.


Original post HERE.

Thanks so much for stopping by!
Monika, My Lovebug Baby

Tuesday, July 26, 2011

Tutorial Tuesdays

This week I thought I would share some crafts that I have found across the web from various sites.
 
 I thought this one would be a good idea for the guests of a tea party to make.
Paper Bowl Hats

 
I really don't know any kids that wouldn't think this was hilarious!
Silly Sunglasses
null

 
If you are planning a camping trip or even a nature hike, this would be nice to make before hand and then the kids can add to it as the trip goes on.
Nature Book

 
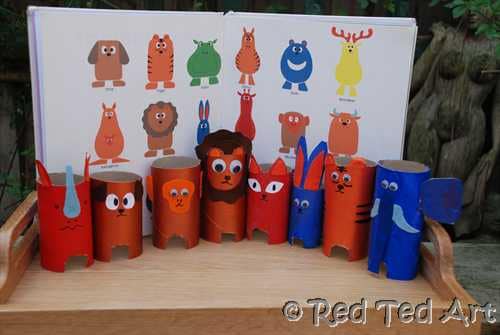
For these I think I will use washable finger paints. The color will stay nicely but will wash off my daughter's hands and face.
Tube Animals
toilet roll animals

 
I have tried this before and it was a HUGE hit at a Summer bbq for the kids! Much better than water balloons since they can be used over and over again. Also, less clean up!
Sponge Water Bombs
image

 
I thought this one would be a nice craft if you take several trips. The kids can bring home a rock from each vacation and then make it into a necklace. Maybe even write on the back where it's from. Better than a cheap souvenier from the gift shop.
Rock Necklaces
Rock Necklaces

Originally posted HERE. 
 
I hope you enjoy some of these great crafts! Good luck and have a great week!


Friday, May 27, 2011

Feature Yourself Friday Linky Party #7!

Hi!

Hope everyone has has a fantastic week!!

I'm gonna get right down to business!! Here are a just a few of the links that caught my eye this week...I soo wish I had the time to feature everyone!!!


Thanks for all the great links, everyone!! Now let's get onto this week!!

Feature Yourself Friday will be a place for you to highlight something you've done!! You can link to blog post or tutorial that you've done or a new item in your shop! We want to see what YOU have been up to!!
The only rule for linking up is that you become a follower of our blog and check out a few of the other links shared!! YOU DON'T HAVE TO BE A MEMBER OF OUR TEAM TO LINK UP!!! (Please link up only TWO posts/items each week!)

Each week we'll pick two or three of the link that stand out to us and feature those here on our blog!  It's just a little way to help everyone see what YOU do!!


Photobucket
<center><em><a href="http://stayathomemomsofetsy.blogspot.com/"><img src="http://i1215.photobucket.com/albums/cc513/stampswithstyle/SAHMLinkyButton.jpg"/></a></em></center>
Let's see whatcha got this week!!!


~ Sarah from Sarahndipities


Wednesday, May 11, 2011

Feature Shop: Nate's Mommy Made It!

Good morning! Makisha, of Nates Mommy Made It!, is a busy mom of two and an active member of our team. Keep reading to meet her and then check out her lovely shop of handmade children's items! -Cori of Peace, Baby! Batiks

What is your name?
Makisha

Where are you located?
Issaquah, WA. About 20 minutes east of Seattle

Tell us a little about yourself.
I'm a SAHM of two little ones under the age of four, Nate and Sierra. I have been married to my wonderful husband Marc for five years. Before having children, we loved to travel and see the world. Now that they are getting bigger, we are excited to show the world to our kids! I love coffee, the sun on my face, the sound of the ocean, frogs croaking, children laughing, favorite music playing, and lazy Saturday mornings. One of my favorite things to do is read and sing to my kids!

Mix And Match - Set of 3 Reusable Snack Bags

What type of merchandise will shoppers find in your shop?
I have a wide variety of baby and children's items in my shop. From baby blankets, ribbon sensory blankets, reusable cloth wipes, plush animals, and reusable snack bags. A little bit of everything for little ones!

How/why did you get started?
I started my little shop almost a year ago. I started thinking about opening it two years before that, but a move to a different state, and the birth of our daughter delayed it for a while. I had always felt it was important to be able to stay at home with my children, so I needed to find a way to supplement our income while doing so. I absolutely LOVED the flannel blankets that my mom had made for my children when they were born, so I thought I'd start with that. Now, I can't stop finding new items to make!

Ribbon Mini Minky Baby Lovey Blanket - Mod Dots

How long have you been sewing? How did you get started?
I have been sewing since I was about 10. I received my first sewing machine at 12, although I never quite got into it much until recently. Having six children, my mom has always been a huge sewer and crafter, mostly out of necessity. Really, my entire family is very crafty. To be honest, I never thought I had it in me, but I quickly realized I did!

What is your favorite thing to make?
I love making my little plush elephants! Nate's favorite animal is an elephant, and I recently made one for him using his favorite outgrown PJ'S. It turned out really cute.

What inspires you to create?

My kids, for sure! A lot of the things I make, I also use in my home. We get a lot of enjoyment out of these things, and I would love for someone else to also.

Pink and Cream Flower Blossoms Chenille Blanket - Baby Shower Gift Set

What is one thing you need to have with you while you craft?

Usually coffee! Quiet, and kid free helps!

How do you balance mothering and running a small business?
It's definitely hard to do. I try to work on small things while my littlest is napping, and Nate is happy to help do "crafts" with me. I am also fortunate to have a great husband who is willing to help out and give me some free time in the evenings to get some sewing time in.

Corduroy Plush Kitty Cat

What is your favorite thing to browse Etsy for?

Anything and everything!

When you're not crafting, what are you doing?
When I'm not doing the usual daily grind..... I like to go on nature walks and hikes with my kids, listen to music, go camping, work in my garden, anything outdoors really!

Where can we find you?
www.etsy.com/shop/NatesMommyMadeit
www.facebook.com/NatesMommyMadeIt1

What is your favorite shop on Etsy currently?

Without a doubt........www.etsy.com/shop/thewheatfield. I love her work, just beautiful!

Green and Brown Damask Minky Stroller Blanket

Wednesday, April 13, 2011

Feature Shop: Wonky Wares

Good morning! Today, meet Jen of Wonky Wares! She is an active member of our blog team -- she makes sure the things we post are proofread and error free! -Cheers! Cori of Peace, Baby! Batiks

What is your name?
Jen

Where are you located?

Wichita, KS, currently, but a native Floridian

Owl Earflap Hat

Tell us a little about yourself.
I'm a SAHM to three precious little boys, and when I'm not chasing them around or crafting, I love to read.

What type of merchandise will shoppers find in your shop?
In my shop, you will find crocheted hats for babies, children and grown-ups; handmade sweeper covers; greeting cards; and much more to come this spring, including baby sandals.

Brimmed Newsboy in Sage with Brown Flower

How/why did you get started?
Wonky Wares began out of my love for crocheting, especially girlie flowered hats and bright colors. Since I'm the only girl in the house, Wonky Wares lets me work with hot pink and lavender yarn and pass my creations on to others.

How long have you been crocheting? Papercrafting? How did you get started in these two crafts?
I've been crocheting for about five years. When I worked in the mental health field, one of our clients taught me a basic stitch, and I was "hooked" after that. I got some books, taught myself some more stitches and how to read patterns, and have enjoyed it ever since! I've been scrapbooking/papercrafting for about 12 years and love how this creative outlet also serves as a functional way to preserve our family's memories.

Reversible, Washable, Eco-Friendly Sweeper Sock

What is your favorite thing to make?
My favorite thing I've ever made was an open weave infant beanie with a big crocheted rosebud on the side. Something about the snowflake blue and winter white just went together perfectly, and the subtle fuzz of the yarn just felt like winter. It was elegant and feminine, and I loved it. I hope it's new owner loves it, too!

What inspires you to create?
I am inspired by bright colors and patterns; I love pairing different colors, and I especially love the spring and summer months when color is all around me!

What is one thing you need to have with you while you craft?
When I'm crafting, I need to have an empty room. I'm easily distracted, especially having three boys under four running around me all day, so when I craft, I like to close the door, put on headphones and just be alone for a little while. Pandora is also a must; preferably set to my Ben Folds station.

Pink Earflap Hat with Tassels and Flower Accent

How do you balance mothering and running a small business?
Figuring out how to balance motherhood and an Etsy shop has definitely been a process. I'm fortunate enough to have little ones that still nap (most days!), so naptime is my dedicated craft/business time. I don't always get to spend as much time as I'd like listing new items, and my "work-in-progress" basket is overflowing currently, but my number one job is motherhood, so I have to take advantage of every minute I can, and learn to cut myself some slack if the day's to-do list doesn't get completed.

What is your favorite thing to browse Etsy for?
Right now, my favorite thing to browse Etsy for is handmade lip balm/solid lotion. There are so many shops out there with some delicious-sounding flavors. I'm definitely in the market, if you have any recommendations!

When you're not crafting, what are you doing?
When I'm not crafting, I'm running after my boys, playing outside, catching up on sleep, or watching documentaries on Netflix with my hubby. Or reading, I love to read.

Cheerful Windmill "Happy Birthday" Card

Where can we find you?
You can find me at wonkywares.etsy.com or on Facebook at facebook.com/wonkywares

What is your favorite shop (not yours) on Etsy currently?
My favorite shop on Etsy has to be Boojiboo (boojiboo.etsy.com) I ADORE her aprons and wear the ones I have all the time. As an often too-casual, covered in crumbs/child goo mom, I love how wearing one of her retro inspired aprons makes me feel pretty, feminine, and dressy. They aren't just for the kitchen, sometimes I wear mine most of the day!

Tuesday, March 22, 2011

Tutorial Tuesday: Eli Elephant by Little Birdie Baby Shop

Happy Tuesday! Or Happy Tutorial-ing... uh? Not sure if that one works, but in any case I'm happy to have you here this Tuesday. I'm really excited about today's tutorial because it's the first one I've done start to finish without an outside pattern or anything. And he's just so stinkin' cute!


Meet "Eli"
He's an elephant, just waiting to meet your little one. 
{even if your "little one" is a dog, it's still a fun project!}


OK, here's what you need:

12"x12" fabric of your choice
needle & thread or sewing machine {I used to be a needle & thread-er, I feel ya guys!}
coordinating piece of felt, or felt scraps
polyfill


Start by pressing out your fabric so it's nice and smooth...


Then, fold your fabric in half with the right sides facing each other.
Draw your elephant shape. He doesn't have to be perfect, he's plush!


Next, sew all around your outline. 
I used the wonky looking zig zag, but I like to see the thread on the outside all "rustic style."
I would suggest pinning your fabric together so everything stays straight.
 {I didn't pin but I used flannel, and it sticks to itself pretty well.}


Be sure to leave an opening to turn inside out. {see pin}
I like to use the space at the bottom because it's less noticeable when you have to sew it back up.


Now cut out your shape! 
I use pinking shears to keep things from fraying {just in case}, 
aaaaand I like the way the little zig-zaggy edges look. Never said I wasn't a dork!


Now get to turning!
{I find that it helps to start by pushing the trunk out first, since it's furthest from the hole.}


Now it's time to stuff him! 
I got this little chopstick-y thing in a bag of polyfil, I'm pretty sure they all come with one, but you can use a chopstick or even a pencil to help get the stuffing in all the little corners and crannies.


Ta DA! All stuffed and ready to sew. I don't usually stuff them too full, just because little baby hands can grab on and chew on it a little better when it's not sooooo full.


I don't know if this stitch has a name, but I stitch in kind of an X pattern. 
It's easy, sturdy, keeps the fabric flat when I'm finished, and goes along with my other rustic edges.


Now for the ears...
Cut ears from your scrap of coordinating felt. 
Mine are about 2 inches long, and just kind of floppy looking and oval shaped.


You can sew these on and they'll turn out great. 
However, I do something a little different...I use embroidery floss 
{because it's heavier duty and you won't run the risk of those sweet little baby hands pulling an ear off} Loop it all the way through the elephant to the other side so his ears are "tufted" to his head like a pillow.
Just pin both ears down to it's head, and it will be easy-peasy.


And here you are! A little Eli the Elephant of your very own. 
{Of course, you can always make him girly and name her Ellie. I don't mind. :) }


OH wait!! 
And if you partner him up with a matching burpie, bib, and jingle block, 
you've got yourself a rockin' baby shower gift set in no time flat! ;)


I hope you all enjoyed this week's tutorial! If anyone makes their own Eli/Ellie, be sure to show me! I love seeing what everyone's adaptations are. :)

Come link up your projects for the week below, I can't wait to see what you've been working on!! Feel free to grab a button if you're linking up!


XOXO


Tutorial Tuesday: Embellished Hand Towels by Little Birdie Baby Shop

I have new towels for my kitchen!


Maybe that doesn't sound like a big deal, but I can never find anything that I like that matches my kitchen. First of all, it's cherry red {already painted when we moved in} with kind of a hodge-podge of mismatched appliances, and ugly cabinets to top it off... so I have trouble accessorizing. Secondly, truth be told - I'm picky. It can get ridiculous at times. I still don't have a matching set of bath/hand/wash towels for the master bath because nothing I've come across speaks to my splishy-splashy side. 
Eh, all in good time I guess. HAHA!

I'm getting off topic, sorry! 

So I'm excited about my little kitchen towels! 
There's only one thing that could make this whole scenario better, and that's if I had made them. 
Oh wait! I DID! Yay me!

P.S. The whole project cost under $2 to make {that's less than $1 per towel!!} 
Now that's a winner in my book!

And because I love you all so much I whipped up a little tutorial so you can make your own fancy pants towels using a couple of scraps and your pocket change. Let's get started!


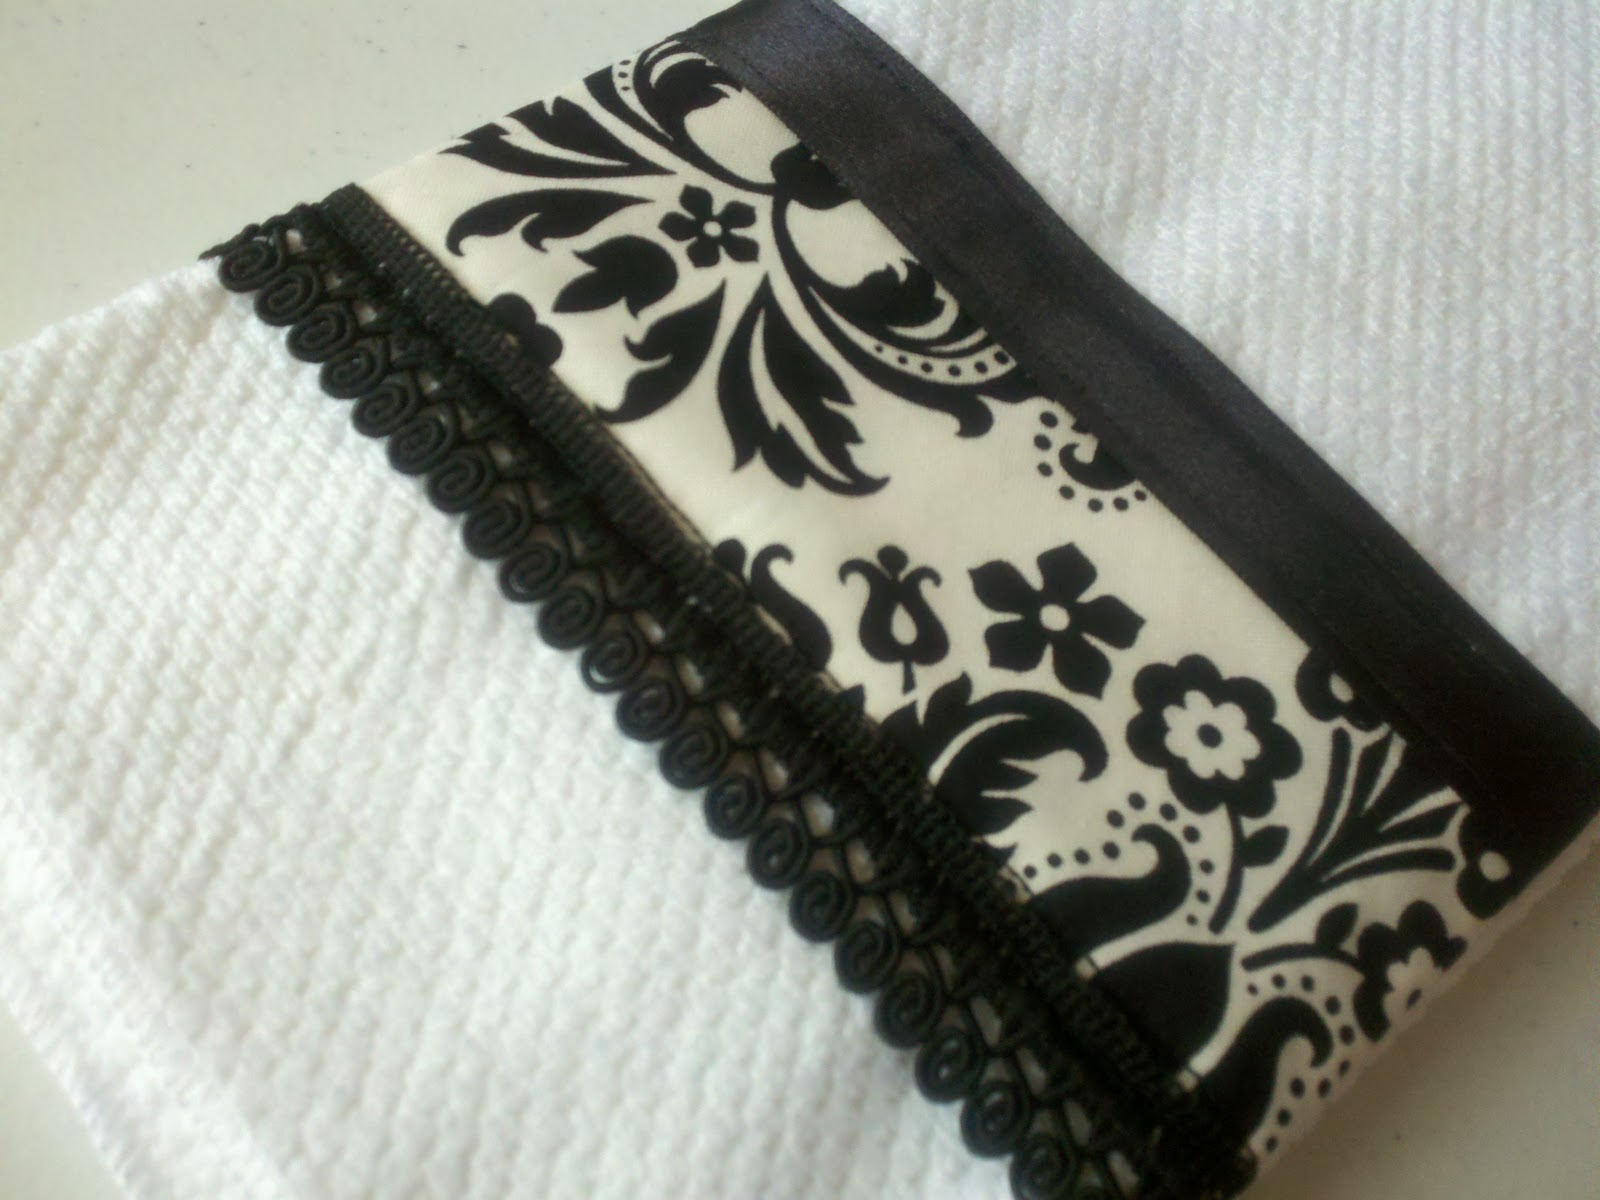
~ Dressed Up Hand Towels ~

Wal*Mart, 2 pack, $1.68. 
SCORE!


My fabric was a little scrap left over from a jelly roll, ribbon was a scrap from my white felt wreath, and the lace stuff a scrap from a ribbon scrap pack I bought at Hobby Lobby ages ago. You don't need much of anything to do this project, these particular towels are only 15" wide to give you an idea.

First, lay your pieces out across the short side of your towel to make sure they are long enough with a bit leftover at each end to fold under and hem. I left about an inch on each end.


I started with my fabric since I knew I wanted it on the bottom. I planned to sew the ribbon and the lace over the top of the raw edges of the fabric so I wouldn't have to do any more hemming than necessary.

I folded under and pinned the edges down first, then used the wonky little zig-zag stitch 
to attach it to the towel. Clean edges, pretty little ziggy zaggy.


Next, I pinned and basted down the long edges. I know I'm going to be attaching the ribbon and lace 
over the fabric, so I mostly just need it to stay down and in place. The real reinforcing will come later.


Now more pinning for the lace...
{what is that stuff? Seriously, I have no idea what to call it, so I'm just going with lace for now.}
And again with the wonky zig zag stitch to make sure this stays in place and can be machine washed.


I did the same thing for the ribbon on top that I did for the fabric: 
Pinned and basted on both the top and bottom long edge. 
Somehow I managed to miss taking the pic on this one so you'll just have to use your imagination, haha!

Iron out any wrinkles, and ta-da! Pretty little dish towel!


They're SO easy, and you already have an extra towel, so why not make it two?


 Two is better than one anyway, I think. :)


Since I made these two, I've been digging around in my scrap box for other coordinating colors to make more. I could seriously solve my entire house-wide towel problem with what I find in my scrap box. :) 
But wouldn't they make great gifts? Housewarming parties, hostess gifts, wedding shower... 


Now let's see what you've been working on this week! I'm excited that our little linky party is growing, thanks to you all for participating and spreading the word. Don't forget, once we have at least 10 link ups I'll do a Saturday post featuring my favorites from that week. 

Grab yourself a button if you're linking up this week, and you can find all the parties I'll be linking up to this week up top under the "linky parties!" tab. There's lots of great spots on that list so definitely go check them out, and let me know if you have a party that I can add to my list!


<a href="http://littlebirdiebaby.blogspot.com/"><img src="https://blogger.googleusercontent.com/img/b/R29vZ2xl/AVvXsEiY_p9bvaD6CdwiCFXPbz0MGh6kEkqVzzr2ovopohVMwd4Dq_ZncBIUKVweV-jGuarGp2q-Da53DpMKiNimRXIgDDy9FPAZPWRTu3GGUiql1KLR2eg5codRy9Nl7lblV05jCn-HGRKu65KQ/s144/Tute%20Tues%20LB.png" height="144" width="144" /></a>


XOXO