Showing posts with label how to. Show all posts

Tuesday, July 19, 2011

Tutorial Tuesday

This week's tutoral comes from Tricia at SweeterThanSweets. Its a great idea to make the hot summer days a little more fun. Enjoy!


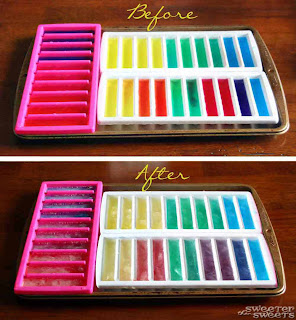
She loves these Rainbow Ice Cubes and was so sad when they were all melted. Next time I'll make a bigger batch!


This would be a great kids' summer camp idea. Older kids can have a great hands-on (literally) learning experience about mixing primary colors and the changing states of matter from liquid to ice. Science or Art Class?

Here's what you need to make Colored Ice Cubes:


Color Bath Dropz by Crayola
water
ice cube trays and/or old plastic bowls, bath toys, or anything you can fill up with water
3 large bowls
spoon or ladle
cookie sheet that fits in your freezer

Make sure that your cookie sheet will fit in your freezer before you start this project. You will make life much easier on yourself if you do it now. Also, your plastic "molds" should be cheap and/or old just in case they crack when you drop it on the ground as you're taking it out of the freezer. (I'm speaking from experience.)

The star of the show here is Crayola's Color Bath Dropz. You can buy these at Target or Wal-Mart in the baby bath section for a few dollars. They are non-toxic, fragrance free and are meant for children at least 3 years of age. Obviously, they're meant for the bath and Rainbow Ice would be fun for bathtime, too! But why not add them to your water table or baby pool?


Fill each bowl with about 3 or 4 cups of water. No need to measure but the less water, the more intense the color. This is a good thing, but if you spill on your way to the freezer, you might end up with a blue carpet. Remember these Dropz are intended to be used in a bath tub with much much more water.


After a few minutes, the Dropz will be dissolved. You don't need to use hot water and there's no need to stir.


Now put your empty "molds" on the cookie sheet to make it easier to move to the freezer without spilling all over the place. Then, carefully pour some water into each mold. Remember what we learned in grade school about mixing primary colors to make secondary (and tertiary) colors? Just fill it halfway with yellow and the rest of the way with red if you want to make orange, for example. No need to stir.

I filled up each bowl with 2-3 ladles of water and each compartment of the small ice cube tray with 3-4 spoonfuls of water. Don't try to pour your big bowls of water to fill these tiny trays. =)


Then move your cookie sheet into the freezer (see why you want to make sure that cookie sheet fits in your freezer before you start this project?) and wait until they're frozen.

I loved how these little ice cubes looked, but they melted so fast outside that next time I'll probably just do the bowls. The Rainbow Ice will lose a bit of its brightness when frozen, as you can see here:


Once they're frozen, unmold them (you may want to put some warm water in the tray to loosen a bit first). Fair warning: your hands will probably be rainbow-colored when you touch them but it easily washes off.


Then rush outside to play or store in freezer zip-top bags for later. Put them in your little sweeties' water table, baby pool or bathtub and get your camera ready!

Little Sweets really liked the small ice cubes but they melted very quickly.


She was so excited that the water turned purple (Mommy's favorite color)!


The blue star ice cube was her favorite. She was trying to smile for me but holding a large ice cube made that a bit difficult.


I would love to see what shapes and colors you can come up with. Let me know if you make these and show off your pictures!


Originally posted HERE.
Thanks!
Monika, My Lovebug Baby

Tuesday, June 28, 2011

Tuesday Tutorials

Just in time for the 4th of July Tricia at SweeterThanSweets brings us a great idea for a decorative banner to add to the festivities! Love, love, love this!!

A Star-Spangled (Paint Chip) Banner - Tutorial


If my mantle looks familiar, you've seen it before with the paint chip Easter egg garland, which was inspired by Modern Parents, Messy Kids.


I'm writing up my own tutorial on this one, since I used a sewing machine instead of doing it by hand. I realized recently how much I dislike sewing by hand! If you've used a sewing machine, you should be able to do this project since it's just a basic straight stitch. If not, do it by hand and it will be just as cute!


What you need to make a Star-Spangled (Paint Chip) Banner:


paint chips in red, white and blue 
scissors
cardboard to cut out a star-shaped template
sewing machine (optional)
white thread
double-sided tape for hanging

I used 21 paint chips total, 7 of each color. Don't worry if some of the red paint chips look pink--you will get the overall look of red, white and blue when it all comes together.

First you want to make yourself a star-shaped template out of your piece of cardboard. I traced one of Little Sweet's star shapes from a foam puzzle, then tweaked the size a bit to fit 2 stars on each paint chip. You could also draw your own or print out a star shape from Photoshop.

You want the white line to be close to the widest part of your star since you'll be sewing directly over that white line to give it some stability:


Trace the star shape onto your paint chips and cut out as many as you want for your banner.


Then admire how patriotic all the stars look:

Okay back to work. It's time to sew now. I had more red and blue stars than white so I used a pattern of red-blue-red-blue-white, repeat.

There are a couple of ways you can sew these together as far as the spacing goes. I tried both and you'll see my results in a minute. The first way is to line them up right next to each other as you sew so they're close together and overlapping just a bit.


Or you can leave a small amount of space in between each star as you sew so they're more spread out. You don't want the gap to be too big because it will be more likely that they'll flip upside down when it's hanging.


I think I like the spread-out look better but the side that I made close together was definitely easier to hang. Can you see the difference?


While you're sewing, be careful how the already-sewn stars fall since you don't want a big jumbled mess when you're done. Then find somewhere to hang your Star-Spangled (Paint Chip) Banner!


So festive and easy to make. This is a quick 1-naptime craft for all you mommies out there!


Think about all the possibilities with this craft: You could make stars to hang above baby's crib as a mobile (double-sided so the backs are pretty too), decorate a birthday party table in your theme colors (sewn together as a banner or just as giant star-shaped "confetti")... so many options.


(Originally posted HERE )

Thanks again for stopping by and I hope you enjoyed this fantastic tutorial!
Monika, My Lovebug Baby

Tuesday, June 14, 2011

Tuesday Tutorials

This week's tutorial comes to us from Tricia at Sweeter Than Sweets. Enjoy!

Cooking Kale for Kids- Tutorial:

Having a baby changes the way you look at things. For me, this meant I wanted to make my own baby food.

Kale for Kids by SweeterThanSweets

Kale is one of those foods that I had never cooked before Little Sweets came along. I didn't know how to buy it or what to do with it. But with the help of the Super Baby Food book by Ruth Yaron (see my post with a fruity recipe from the book here), I learned about the health benefits of kale and what to do with it.

{A disclaimer if you're a first-time visitor to my blog: I have never dedicated a whole post to a leafy green vegetable before. Also, I apologize in advance for the pictures that I take in my kitchen. I have one tiny window and not enough natural light to work with.}

So why kale? It is one of the healthiest vegetables you or your baby can eat. Check out the Vitamins section of this chart. Each cup of kale provides you with tons of Vitamin K, Vitamin C and Vitamin A. (Here's another resource with charts that might sell you on kale.)

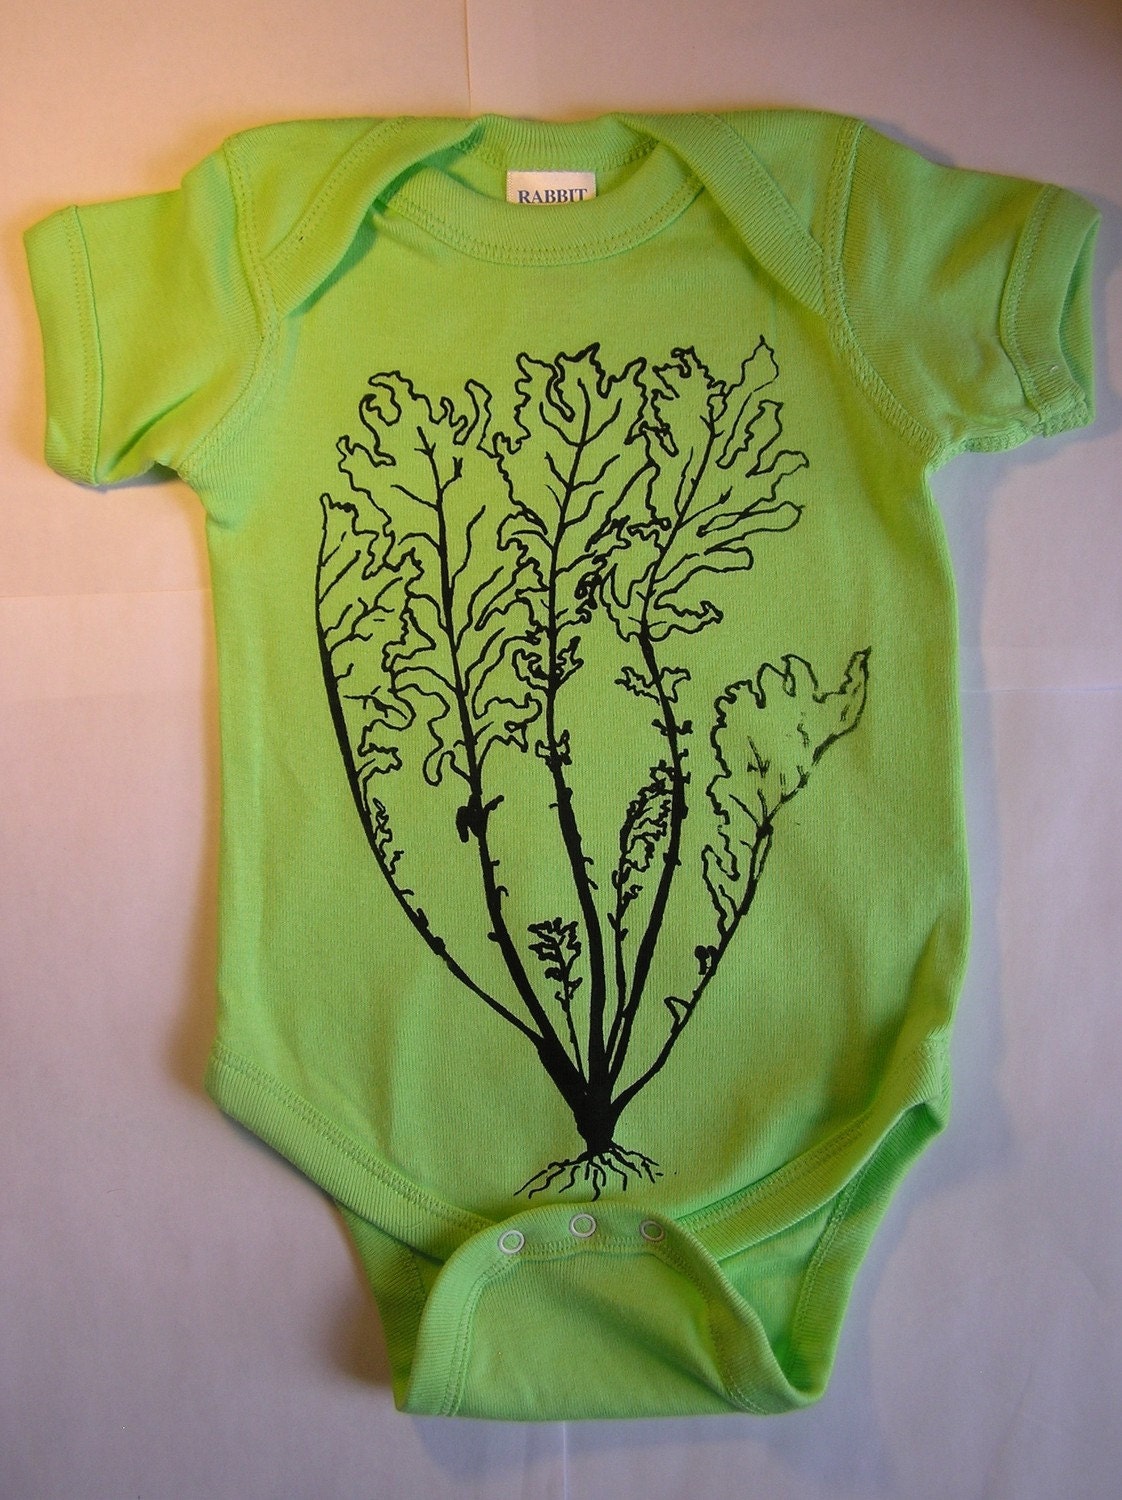
Kale Onesie by swordfishscreenprint on Etsy
Kale Onesie by swordfishscreenprint

You can steam, puree and freeze kale into ice cube trays and then sneak those frozen cubes into oatmeal, soups, pasta sauces or whatever else you can get away with.

**Babies need to be at least 9 months old before you feed them kale.**

What you need to cook, puree and freeze kale:

Kale for Kids by SweeterThanSweets

kale
food processor (please use a bigger one than this if you're doing a large batch)
pot with steamer basket/insert
ice cube trays
heavy-duty freezer zip-top bags

I bought a 2-pound bag of kale. The bagged kale is prewashed, trimmed and cut already, which saves a lot of time. If you buy loose kale instead (which is recommended in Super Baby Food), swish the leaves around in a sink full of water several times to make sure all the sand has been freed. Then trim it by pulling the leaves off the stems (throw stems away). Then chop it into small pieces. Or you could buy the bagged prewashed, pretrimmed, precut kale.

It took me 1 hour to do this entire process (would've been faster with a bigger food processor). I got 28 ice cubes from this 2-pound bag of kale, which was 28 cups of kale. So when I cook with it, I know that 1 ice cube = 1 cup of raw kale.

Put an inch or so of water into your pot and bring to a boil. Then fill the basket up with kale and cover; cook for 3-5 minutes. I fit about 1/2 pound of the kale at a time in my steamer basket.

Kale for Kids by SweeterThanSweets

Here's what it looked like when it was done cooking. The kale will reduce in size by about half when cooked:

Kale for Kids by SweeterThanSweets

Put some of your cooked kale into your food processor and squeeze out some excess water by pressing down on it with a few paper towels. Then process until the kale is pureed into what looks like tiny flakes. You want the flakes to be pretty small so they're less noticeable when you mix the kale into your food:

Kale for Kids by SweeterThanSweets

Using my tiny 3-cup food processor, I had to do 7 rounds of pureeing for this 2-pound bag of kale. Immediately after I finished cooking the kale for this tutorial, I bought a new 12-cup food processor. It will be much easier/faster next time!
Now squeeze your kale flakes into the ice cube trays. Pack it in tightly so it will stick together when you pop the ice cubes out. I soaked up a bit more water by pushing down on each cube with another paper towel.

Repeat the cook/puree/squeeze process with the rest of the kale. Like I said, I ended up with 28 ice cube-sized portions of kale. The 2-pound bag held 28 cups of kale, so 1 ice cube = 1 cup of raw kale. Somehow it ended up perfectly proportioned, but this is not a science so you may end up with more or less than I did.

Kale for Kids by SweeterThanSweets

Put your trays into a freezer-safe zip-top bag and freeze for a day or so. Then pop the "kale cubes" out and put them back into the freezer bag.

Kale for Kids by SweeterThanSweets

Frozen kale cubes will last in your freezer for awhile. Super Baby Food says they'll keep 2 months but this website says they'll last 10-12 months. Would you think I'm a bad mom if I told you I've been feeding Little Sweets frozen kale from 11 months ago? She hasn't gotten sick, but maybe some of the health benefits have deteriorated a bit.

Stay tuned to see my recipe for Little Sweets' Favorite Oatmeal with Kale... but don't tell her what those green flecks are.

Tuesday, May 31, 2011

Tutorial Tuesday - Pattern Weights

Hello all! I'm a bit late today with the post, the 3 day weekend got the better of me! This week's tutorial comes to us from Celesa at Lilly Bunns Boutique. Enjoy!


There's nothing I hate more than pinning a pattern and cutting out the fabric when I'm doing a project.  I absolutely love my rotary cutter and mat.  It saves me so much precious time!  If you have yet to take the rotary leap, I highly recommend you jump in as soon as you can! I promise, you'll never look back! It's also great for those with bad hands!

You have to hold your pattern down in one spot when you're using a rotary cutter and mat; that's where pattern weights come in.  Just plop them down on top of your pattern when your cutting, and it wont move around on you!
What you'll need:

Half to 1.5  inch strips of fabric or ribbon

Hot glue gun and hot glue (high temp is best)

Washers- you need 2 per weight (I got the biggest ones at Home Depot I could find. They are zinc coated)


Start off with 2 washers.  Place a dab of hot glue on
one of them and place the end of your fabric strip on it.  Put hot glue around it in a circle and place the other washer on top, sandwiching the end of the fabric strip between the washers.


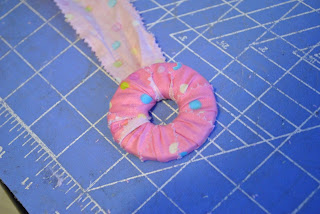
Now begin wrapping the material around the washer going through the hole.


And keep wrapping....


And wrapping until none of the washer is showing.
 Place a small dab of hot glue and lay the excess material on it.  Cut away the extra....


Originally posted HERE by Lilly Bunns Boutique.


I hope you enjoyed this week's tutorial, I know I will be trying these out this week!

Monika, My Lovebug Baby

Tuesday, May 24, 2011

Tutorial Tuesday - Photo Marbles

This week's tutorial comes to us from Tricia at HowSweeterItIs:

Have you ever seen a fridge without a photo on it? They are kind of sad and lonely-looking.

Here's a way to spice up your fridge! These would make great gifts for Dad on Father's Day, for a high school grad moving away from home, or for your kids' teacher to say Thank You!


What you need to make Photo Marbles:

digital photos
printer paper
clear, flat marbles*
Mod Podge
paint brush
magnets (make sure they're smaller than the marbles)
hot glue gun or superglue

*Note on the marbles: I got mine in the floral section of Michael's but they're also available here and here. Pick any size you want, but make sure they're clear and not iridescent. See the difference here? The two on the left are iridescent and the two on the right are clear:


First you'll need to figure out how big your photos need to . Using a photo editing program, do a trial run (or two) and print some small, cropped photos. Make sure the whole face fits under the marbles!

Then, print up a page full of the correct size photos. If you're making this for a gift, you can keep it a surprise by "borrowing" pictures from their Facebook page. (Since the printed size is so small, even low quality/small photos work great for this project--just make sure the color and lighting are decent.)


Now you're going to cut the photos to fit the marbles. I like to just hold the paper in place while I cut. You could also trace an outline but it takes longer and I tend to be a lazy crafter sometimes. We don't need perfection here. =)


Time to Mod Podge. Paint a thin layer of Mod Podge on your marble, then lay your photo right-side down onto the glue. Press down firmly to adhere photo to marble and look at the front to make sure there aren't globs of glue anywhere. Try not to move the photo around after you lay it on the glue (if you move it too much, the color from the printer ink will start to smudge), just press straight down.

If the photo edge extends past the marble, trim it up. Then Mod Podge another thin layer and lay upside-down to dry.


Now it's time to add the magnets. I put a dollop of hot glue on one side of the magnet and adhere it to the back of the photo marble.


Side note on the magnets: I used super-strong magnets which was probably a mistake. Since I was mailing them as gifts and packaging them together, the magnets kept getting stuck together and the magnets were coming unglued. An obvious solution is to not buy the super-strong ones. Or you can put them in a magnetic box or on a magnetic strip when mailing so they stick to that and not each other.


All done!


Think about all the other things you could do with these marbles:
  • Use patterned cardstock and make cute generic magnets to have on hand for a quick and easy gift
  • Print up the letters of the alphabet in a cute, easy-to-read font for kids to practice spelling
  • Use photo marbles to hold up important papers for each member of the family (a fridge filing system?)
  • Buy giant marbles and make paperweights or coasters
  • Print words and your families' names and make your own set of "magnetic poetry"
Originally posted HERE by HowSweeterItIs.

Thank you for stopping by! I hope to see you next week for another great tutorial from the SAHM of Etsy Team!

Monika, My Lovebug Baby