

She loves these Rainbow Ice Cubes and was so sad when they were all melted. Next time I'll make a bigger batch!

This would be a great kids' summer camp idea. Older kids can have a great hands-on (literally) learning experience about mixing primary colors and the changing states of matter from liquid to ice. Science or Art Class?
Here's what you need to make Colored Ice Cubes:
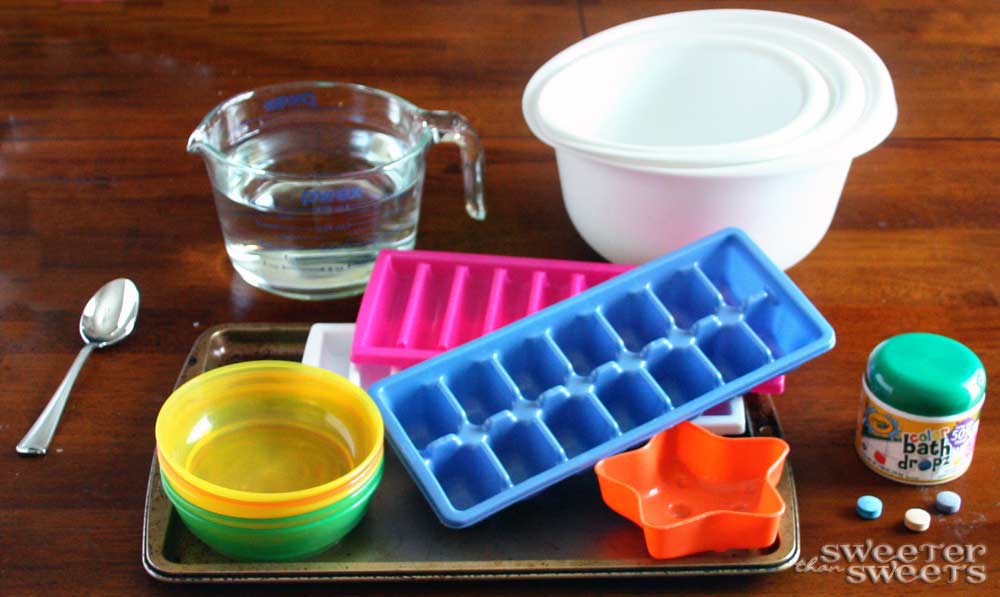
Color Bath Dropz by Crayola
water
ice cube trays and/or old plastic bowls, bath toys, or anything you can fill up with water
3 large bowls
spoon or ladle
cookie sheet that fits in your freezer
Make sure that your cookie sheet will fit in your freezer before you start this project. You will make life much easier on yourself if you do it now. Also, your plastic "molds" should be cheap and/or old just in case they crack when you drop it on the ground as you're taking it out of the freezer. (I'm speaking from experience.)
The star of the show here is Crayola's Color Bath Dropz. You can buy these at Target or Wal-Mart in the baby bath section for a few dollars. They are non-toxic, fragrance free and are meant for children at least 3 years of age. Obviously, they're meant for the bath and Rainbow Ice would be fun for bathtime, too! But why not add them to your water table or baby pool?

Fill each bowl with about 3 or 4 cups of water. No need to measure but the less water, the more intense the color. This is a good thing, but if you spill on your way to the freezer, you might end up with a blue carpet. Remember these Dropz are intended to be used in a bath tub with much much more water.

After a few minutes, the Dropz will be dissolved. You don't need to use hot water and there's no need to stir.

Now put your empty "molds" on the cookie sheet to make it easier to move to the freezer without spilling all over the place. Then, carefully pour some water into each mold. Remember what we learned in grade school about mixing primary colors to make secondary (and tertiary) colors? Just fill it halfway with yellow and the rest of the way with red if you want to make orange, for example. No need to stir.
I filled up each bowl with 2-3 ladles of water and each compartment of the small ice cube tray with 3-4 spoonfuls of water. Don't try to pour your big bowls of water to fill these tiny trays. =)

Then move your cookie sheet into the freezer (see why you want to make sure that cookie sheet fits in your freezer before you start this project?) and wait until they're frozen.
I loved how these little ice cubes looked, but they melted so fast outside that next time I'll probably just do the bowls. The Rainbow Ice will lose a bit of its brightness when frozen, as you can see here:


Then rush outside to play or store in freezer zip-top bags for later. Put them in your little sweeties' water table, baby pool or bathtub and get your camera ready!
Little Sweets really liked the small ice cubes but they melted very quickly.

She was so excited that the water turned purple (Mommy's favorite color)!

The blue star ice cube was her favorite. She was trying to smile for me but holding a large ice cube made that a bit difficult.

I would love to see what shapes and colors you can come up with. Let me know if you make these and show off your pictures!

Thanks!
Monika, My Lovebug Baby
Thanks so much for sharing with this with the SAHM of Etsy team!
ReplyDelete