Wednesday, March 23, 2011

Feature Shop: The Cuddle Corner

Good morning! We have several active members on our team who have been here and worked hard since nearly the start of the team. Today, meet one of those members: Stephanie of The Cuddle Corner. We appreciate all you do, Stephanie! -Cori of Peace, Baby! Batiks

What is your name?
Stephanie

Where are you located?
Albuquerque, NM

Tell us a little about yourself.
I have two beautiful boys and have been married to my wonderful husband, James, for almost nine years now! After graduating from college, I worked as a software engineer for The Boeing Company for about three years. But, James and I decided we wanted to start a family and wanted to be closer to our own families when that point came. So I left cubicles and yearly raises for laundry and diaper duty. I always knew that I wanted to be a Mommy and that, if at all possible, I wanted to stay home with my kids! God has blessed me with the opportunity to do just that and I love every day of it!! Well, aside from the days that I want to pull all of my hair out, but you know...

Personalized Camouflage and Green Full Size Hooded Bath/Beach Towel

What type of merchandise will shoppers find in your shop?
My shop has stuff for babies and toddlers as well as a few things for mommies! I love to do things that are personalized, and applique is kinda my thing. I've got hooded towels, special occasion Ts, sibling Ts, diaper bags, embellished burp cloths, nursing covers, and a couple of other things.

How/why did you get started?
I had actually never even heard of Etsy until my sister-in-law told me I should try to sell my things there. So I looked in to it and thought I would give it a try!


Diaper Bag in Chocolate Brown and Sweet Baby Blue Elephant

How long have you been crafting?
I never thought of my self as artistic, but I love to imagine things up and then try to create them. I have only been sewing for about a year.

What got you started sewing?
They say necessity is the mother of invention and I have found that to be true! I was pregnant, and  it seemed like everyone we knew was also having a baby and baby gifts can get very expensive! I had just gotten a sewing machine and I thought, what was the one thing that I loved when my son was born. The first thing that came to mind was a full-size hooded towel.

Bright Pink Short Sleeve Big Sis / Sister Toddler Sibling Tee Shirt

What inspires you to create?
My little ones and the little ones of my family and friends! Also, life's everyday challenges.

What is one thing you need to have with you while you craft?
Definitely a good pair of scissors!

How do you balance mothering and running a small business?
It is definitely a challenge. I mostly try to get stuff done while my oldest is napping. I know that won't be much longer, though, so I'll have to come up with a new plan. :)

Personalized Boys Navy and White Raglan Style Baseball T Birthday Shirt

What is your favorite thing to browse Etsy for?
I love to look at all things girly -- bags/purses, frilly things, jewelry, sewing accessories!

When you're not crafting, what are you doing?
Playing with my boys, doing house work, going to Bible study or church, hangin' out with my hubby, or visiting my family.

Set of 2 Personalized Burp Cloths in Blue/Green Diamond

Where can we find you?
www.thecuddlecorner.etsy.com
www.facebook.com/thecuddlecorner

What is your favorite shop on Etsy currently?
Atouchofstardust or jessicalynneart (I heart my Pug!)

Tuesday, March 22, 2011

Tutorial Tuesday: Eli Elephant by Little Birdie Baby Shop

Happy Tuesday! Or Happy Tutorial-ing... uh? Not sure if that one works, but in any case I'm happy to have you here this Tuesday. I'm really excited about today's tutorial because it's the first one I've done start to finish without an outside pattern or anything. And he's just so stinkin' cute!


Meet "Eli"
He's an elephant, just waiting to meet your little one. 
{even if your "little one" is a dog, it's still a fun project!}


OK, here's what you need:

12"x12" fabric of your choice
needle & thread or sewing machine {I used to be a needle & thread-er, I feel ya guys!}
coordinating piece of felt, or felt scraps
polyfill


Start by pressing out your fabric so it's nice and smooth...


Then, fold your fabric in half with the right sides facing each other.
Draw your elephant shape. He doesn't have to be perfect, he's plush!


Next, sew all around your outline. 
I used the wonky looking zig zag, but I like to see the thread on the outside all "rustic style."
I would suggest pinning your fabric together so everything stays straight.
 {I didn't pin but I used flannel, and it sticks to itself pretty well.}


Be sure to leave an opening to turn inside out. {see pin}
I like to use the space at the bottom because it's less noticeable when you have to sew it back up.


Now cut out your shape! 
I use pinking shears to keep things from fraying {just in case}, 
aaaaand I like the way the little zig-zaggy edges look. Never said I wasn't a dork!


Now get to turning!
{I find that it helps to start by pushing the trunk out first, since it's furthest from the hole.}


Now it's time to stuff him! 
I got this little chopstick-y thing in a bag of polyfil, I'm pretty sure they all come with one, but you can use a chopstick or even a pencil to help get the stuffing in all the little corners and crannies.


Ta DA! All stuffed and ready to sew. I don't usually stuff them too full, just because little baby hands can grab on and chew on it a little better when it's not sooooo full.


I don't know if this stitch has a name, but I stitch in kind of an X pattern. 
It's easy, sturdy, keeps the fabric flat when I'm finished, and goes along with my other rustic edges.


Now for the ears...
Cut ears from your scrap of coordinating felt. 
Mine are about 2 inches long, and just kind of floppy looking and oval shaped.


You can sew these on and they'll turn out great. 
However, I do something a little different...I use embroidery floss 
{because it's heavier duty and you won't run the risk of those sweet little baby hands pulling an ear off} Loop it all the way through the elephant to the other side so his ears are "tufted" to his head like a pillow.
Just pin both ears down to it's head, and it will be easy-peasy.


And here you are! A little Eli the Elephant of your very own. 
{Of course, you can always make him girly and name her Ellie. I don't mind. :) }


OH wait!! 
And if you partner him up with a matching burpie, bib, and jingle block, 
you've got yourself a rockin' baby shower gift set in no time flat! ;)


I hope you all enjoyed this week's tutorial! If anyone makes their own Eli/Ellie, be sure to show me! I love seeing what everyone's adaptations are. :)

Come link up your projects for the week below, I can't wait to see what you've been working on!! Feel free to grab a button if you're linking up!


XOXO


Tutorial Tuesday: Embellished Hand Towels by Little Birdie Baby Shop

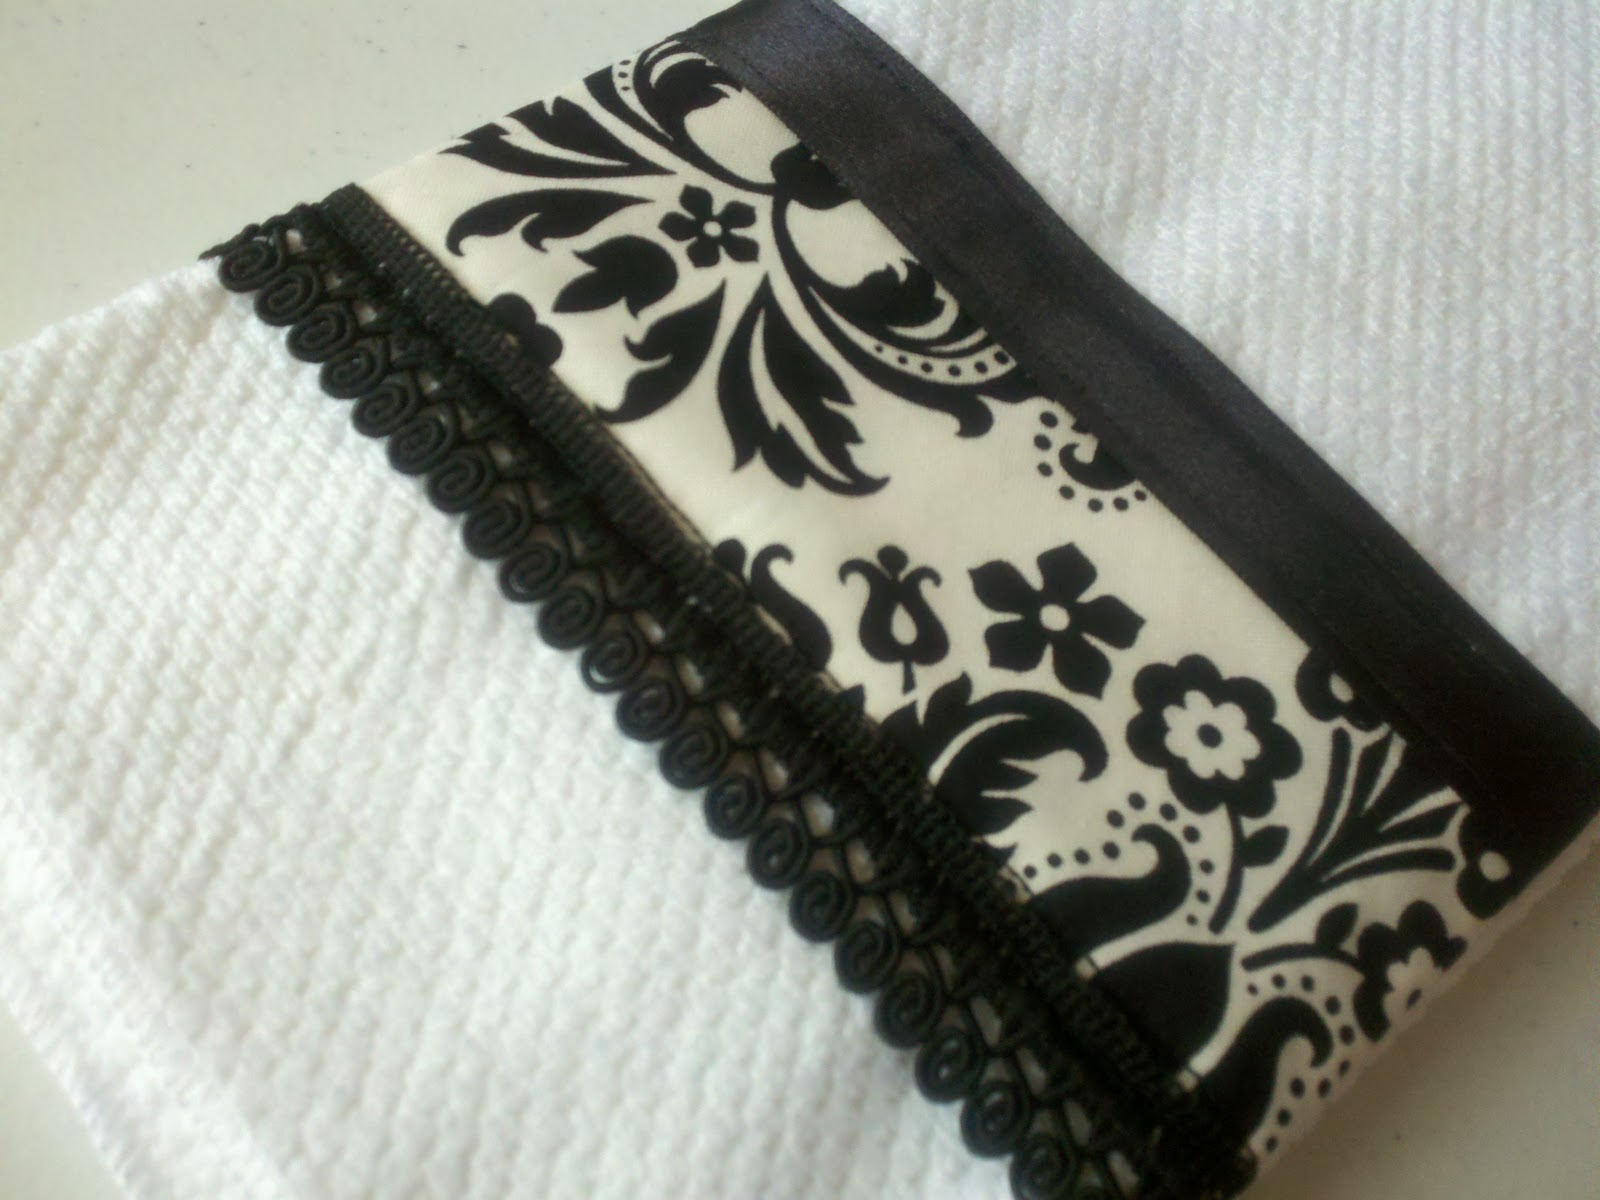
I have new towels for my kitchen!


Maybe that doesn't sound like a big deal, but I can never find anything that I like that matches my kitchen. First of all, it's cherry red {already painted when we moved in} with kind of a hodge-podge of mismatched appliances, and ugly cabinets to top it off... so I have trouble accessorizing. Secondly, truth be told - I'm picky. It can get ridiculous at times. I still don't have a matching set of bath/hand/wash towels for the master bath because nothing I've come across speaks to my splishy-splashy side. 
Eh, all in good time I guess. HAHA!

I'm getting off topic, sorry! 

So I'm excited about my little kitchen towels! 
There's only one thing that could make this whole scenario better, and that's if I had made them. 
Oh wait! I DID! Yay me!

P.S. The whole project cost under $2 to make {that's less than $1 per towel!!} 
Now that's a winner in my book!

And because I love you all so much I whipped up a little tutorial so you can make your own fancy pants towels using a couple of scraps and your pocket change. Let's get started!


~ Dressed Up Hand Towels ~

Wal*Mart, 2 pack, $1.68. 
SCORE!


My fabric was a little scrap left over from a jelly roll, ribbon was a scrap from my white felt wreath, and the lace stuff a scrap from a ribbon scrap pack I bought at Hobby Lobby ages ago. You don't need much of anything to do this project, these particular towels are only 15" wide to give you an idea.

First, lay your pieces out across the short side of your towel to make sure they are long enough with a bit leftover at each end to fold under and hem. I left about an inch on each end.


I started with my fabric since I knew I wanted it on the bottom. I planned to sew the ribbon and the lace over the top of the raw edges of the fabric so I wouldn't have to do any more hemming than necessary.

I folded under and pinned the edges down first, then used the wonky little zig-zag stitch 
to attach it to the towel. Clean edges, pretty little ziggy zaggy.


Next, I pinned and basted down the long edges. I know I'm going to be attaching the ribbon and lace 
over the fabric, so I mostly just need it to stay down and in place. The real reinforcing will come later.


Now more pinning for the lace...
{what is that stuff? Seriously, I have no idea what to call it, so I'm just going with lace for now.}
And again with the wonky zig zag stitch to make sure this stays in place and can be machine washed.


I did the same thing for the ribbon on top that I did for the fabric: 
Pinned and basted on both the top and bottom long edge. 
Somehow I managed to miss taking the pic on this one so you'll just have to use your imagination, haha!

Iron out any wrinkles, and ta-da! Pretty little dish towel!


They're SO easy, and you already have an extra towel, so why not make it two?


 Two is better than one anyway, I think. :)


Since I made these two, I've been digging around in my scrap box for other coordinating colors to make more. I could seriously solve my entire house-wide towel problem with what I find in my scrap box. :) 
But wouldn't they make great gifts? Housewarming parties, hostess gifts, wedding shower... 


Now let's see what you've been working on this week! I'm excited that our little linky party is growing, thanks to you all for participating and spreading the word. Don't forget, once we have at least 10 link ups I'll do a Saturday post featuring my favorites from that week. 

Grab yourself a button if you're linking up this week, and you can find all the parties I'll be linking up to this week up top under the "linky parties!" tab. There's lots of great spots on that list so definitely go check them out, and let me know if you have a party that I can add to my list!


<a href="http://littlebirdiebaby.blogspot.com/"><img src="https://blogger.googleusercontent.com/img/b/R29vZ2xl/AVvXsEiY_p9bvaD6CdwiCFXPbz0MGh6kEkqVzzr2ovopohVMwd4Dq_ZncBIUKVweV-jGuarGp2q-Da53DpMKiNimRXIgDDy9FPAZPWRTu3GGUiql1KLR2eg5codRy9Nl7lblV05jCn-HGRKu65KQ/s144/Tute%20Tues%20LB.png" height="144" width="144" /></a>


XOXO