
Here's another clever idea on reusing you gum tins from sillygeesedesigns I happen to have magnet sheets and some cute tins that I was not sure what to do with. I also have the problem of my needles get lost all the time. Perfect solution for me! Thanks Sillygeesedesigns!
Okay, so technically this is a gum tin... This week I started looking for a way to keep my needles put, a place to put them and not worry about my baby knocking them all over the floor. And if they do fall to the floor an easy way to pick them up.


 The one cut on the trace lines I put on the inside of the tin. After gluing down my magnet I glued in the fabric
I cut a scrap a little big for the top. My trick to gluing it down with a hot glue gun that works on the lid does not work on the inside, you just have to be quick and make sure the gun is hot. See how the magnet holds my needles secure.

For the lid go slowing and work a small section at a time, and try to avoid big globs. I again used an anchor in the middle by glueing down the embroidery, then I still went around the top edge, then around the side edges leaving the corners undone so the stick out kinda funny. Trim the fabric so that it goes all the way down to the curled up edge of the tin.
 Just like tin #2 I slit the edges and cut out a notch so that they cover the corner without bunching. I didn't like the raw edges showing so I glued down a pretty trim to hide it.


Okay, so technically this is a gum tin... This week I started looking for a way to keep my needles put, a place to put them and not worry about my baby knocking them all over the floor. And if they do fall to the floor an easy way to pick them up.

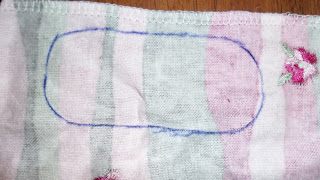
So this was my third tin. I rounded up what I thought I'd use. I have some flannel scraps, and a magnet that came off a fridge magnet. I again traced the tin on my fabric, twice, in this case triing to center a pretty piece of embroidery from the fabric on one piece, then cutting that one out slightly outside the lines.
.


I cut a scrap a little big for the top. My trick to gluing it down with a hot glue gun that works on the lid does not work on the inside, you just have to be quick and make sure the gun is hot. See how the magnet holds my needles secure.

For the lid go slowing and work a small section at a time, and try to avoid big globs. I again used an anchor in the middle by glueing down the embroidery, then I still went around the top edge, then around the side edges leaving the corners undone so the stick out kinda funny. Trim the fabric so that it goes all the way down to the curled up edge of the tin.


No comments:
Post a Comment