Thursday, March 10, 2011

Treasury Thursdays

You've probably noticed by now, but we will be having "themes" for each day now! Thursdays are set aside just for treasuries! "What the heck is a treasury?" you may ask.  A treasury is a curated list of item put together by the Etsy community.  It's a great way to see several items at a time.  I love to "shop" with treasuries, cause it gives me an opportunity to see coordinating items all together!

I've chosen several of my faves this week made by members of our wonderful SAHM of Etsy team! Please take the time to comment, and click on several of the items!  I just love the colors in these!

Oh My Lemon Pie
Oh My Lemon Pie by Paper and Whimsy


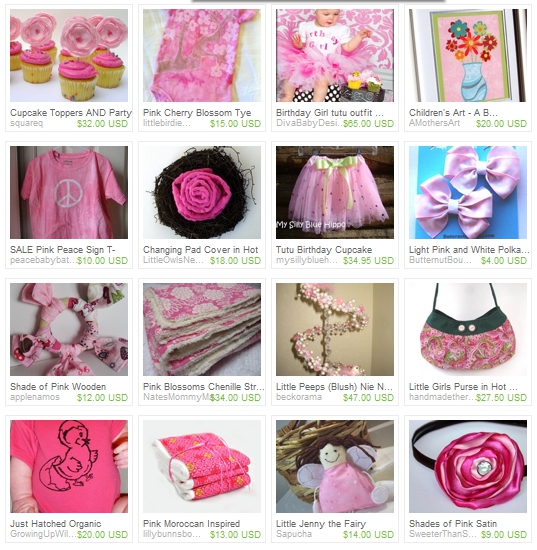
Pretty Princesses Prefer Pink
Pretty Princesses Prefer Pink by Scissor Goddess
My Sweet Blue Baby

My Sweet Blue Baby by Growing Up Wild

Great job on the treasuries ladies!

Celesa- Lilly Bunns Boutique

Wednesday, March 9, 2011

Feature Shop: Storybook Styles

We have so many creative moms on the SAHM of Etsy Team, and I hope you are enjoying meeting them as much as I am! This week, meet Jennifer of Storybook Styles. If your kid loves playing dress up as much as mine does, you'll want to read about Jennifer and the clothing she creates to spark the imagination! Cheers! -Cori of Peace, Baby! Batiks

Jennifer and her family
What is your name? 
Jennifer

Where are you located? 
New Lenox, IL

Tell us a little about yourself.
I am a stay-at-home mom of two children and have been married for 12 years. I used to work in advertising but decided to stay home seven years ago when my son was about six months old.

What type of merchandise will shoppers find in your shop? 
Costumes and children's boutique-style clothing.

How/why did you get started?
It started when I was making Halloween costumes for my kids. I made my daughter a Little Red Riding Hood cape, but the pattern ended up running large so I thought I would list it on Etsy to see if anyone wanted to buy it. Well, the timing was right before Halloween, and I ended up making many more of them.

Little Red Riding Hood Costume

How long have you been sewing? What got you into sewing in the first place?
My mom sewed some of my clothes and most of my Halloween costumes as a child. I always thought those items were special and wanted to do the same for my kids. I learned a few things from my mom, but also took classes and have been sewing more seriously for the last two years.

Where did the idea for Storybook Styles come from?
It all started with the Little Red Riding Hood cape and my family's love of books. I have also been very disappointed with the quality of children's costumes and dress-up clothes, so I wanted to make something that is more durable and can be used for more than just one day.

Tinkerbell Fairy TuTu

Why do you think dress-up play is important?
I feel that children playing dress up helps them to grow their imaginations and to act out real life situations, which helps them grow creatively and just as people in general.

What inspires you to create?
My kids' interests, books, and movies, as well as the satisfaction of making something that other people enjoy.

What is one thing you need to have with you while you craft? 
My sewing machine and music playing in the background.

Child's King Queen Princess Purple Cape

How do you balance mothering and running a small business? 
Being a mom is my first priority, so I end up doing most of my work for my shop when they are at school or when everyone is in bed for the night. But sometimes my daughter will sit next to me and pretend to sew which always makes me smile!

What is your favorite thing to browse Etsy for?
Children's items (clothing and hair accessories) as well as unique home decor.

When you're not crafting, what are you doing?
Just being a typical mom, taking care of the kids and the house.

Madeline Costume

Where can we find you?
www.storybookstyles.etsy.com

What is your favorite shop (not yours) on Etsy currently?
I have many -- it is hard to pick just one! Sweetie Pie Cake Topper Shop, Thomas Park Gifts, Aidille, and Old Barn Rescue Company are just a few.

Girl Gnome Costume

Tuesday, March 8, 2011

How-To Tuesday: Tissue Paper Flowers


I'm sure that many of you already know the basics of making tissue paper flowers, but I thought I'd share a quick tutorial on how to make some cute, quick flowers! I love crafts like this because I can use something that is waaaaaay past its prime (ie crumpled re-gifted tissue paper from who knows when) to make something cute and gift-worthy! These are really simple and kids can help make them, too!

Materials needed:
tissue paper, in any colors you'd like!
pipe cleaners
buttons
hot glue gun (mom tool!)
scissors


We started out with big sheets of tissue paper, that I cut into squares to make them more manageable for the kids. I cut them into squares about 4 to 5 inches big...As you can see I was not so precise in them being exact squares.


Next layer four or five squares on top of each other and folded them into quarters. Then cut petal shapes out of the folded quarters of paper...I cut mine in a sort of heart shape for Valentine's day. **REMEMBER TO LEAVE THE CENTER FOLD UNCUT!!!** (We had a couple of mishaps with this step...if you cut the center of the paper you end up with a bunch of unattached petals!)


After all the cutting is done unfold the petals and separate them from one another. Then you can layer them back together, overlapping and filling in gaps.


Gently push a pipe cleaner through the center of the flower, put a button on it, and bend it over, and through the other button hole to make a little center for your flower. (You may have to help with poking the holes in the flowers.)


The next few steps are ones that Moms should probably help with! Put a little dab of hot glue under the button, and gently pulled the button down onto the tissue. (This step is optional, but makes your flower a little sturdier. If you're doing this project with younger kids, you can skip the next few steps altogether and go straight to the finishing step!)


To cut leaves, I just folded up some green tissue paper and cut a leaf shape out. After fastening the top of the flower together, I glued a couple of leaves to the bottom of the flower, and pinched them to give some dimension.


Then I used a strip of green tissue, and wrapped it around the rest of the stem, gluing as I went and adding a couple more leaves. (Again, this is totally optional, but makes the flower look a little more finished...especially if you are using white pipe cleaner, instead of green, like I did!)


To finish the flower gently scrunch the layers of petals upward, to add some texture, and then 'fluff' them up.


Ta-da!! A simple and sweet tissue paper flower! (I know. It's not Martha Stewart. But hey...it's a pretty good knock-off, eh?)


You can create all sorts of petal shapes, and edges to your flowers! Use pinking shears or other shaped scissors to get some really fun effects! You can also layer different colors together to make some truly unique flowers!

A bouquet of these adorable tissue paper flowers would make really sweet gifts for teachers, grandmas, and other special ladies in your kids' lives!