
Are you looking for ways to make your blog more attractive? Check out these tips below on how to customize your blog tabs by Lilly Bunns Boutique
Making customized blog tabs for your Blogger Blog
1) Create your image. I chose to make this banner for the handmade-ish look. (it's about 900 by 100) I suggest looking to see how wide the width of the main background is on your blog (the white part on mine) and then going about 200 pixels less that that.

2) Separate the image to get each button.
- Make a selection around the first button.

- Click on Image> Crop To selection

- Then save image as whatever file name you choose. Make sure to save in a .jpeg, .gif, or .png file!

- Now undo the "crop to selection" (crtl+z). "Grab" the left side of the selection and move it to the right until there is a selection around the next button. This makes sure that it crops right against the first crop so there are no spaces when we add the buttons to your blog. Go to image>Crop to selection as before and repeat the entire process for each button. Be sure to name them each differently!

3) Now upload the pictures to your favorite photo hosting service. I like Photobucket because it's easier to copy the links you'll need later, and do other cool things for your blog. (like the slideshow on Son Rise page)
4) Next choose your blog from the blogger dashboard and click on the "pages" link. Click on "New Page" and make the pages the way you want them (you'll have to do this for as many pages as you have). Click "publish" as you would a regular post. Beside "Show Pages As" be sure to

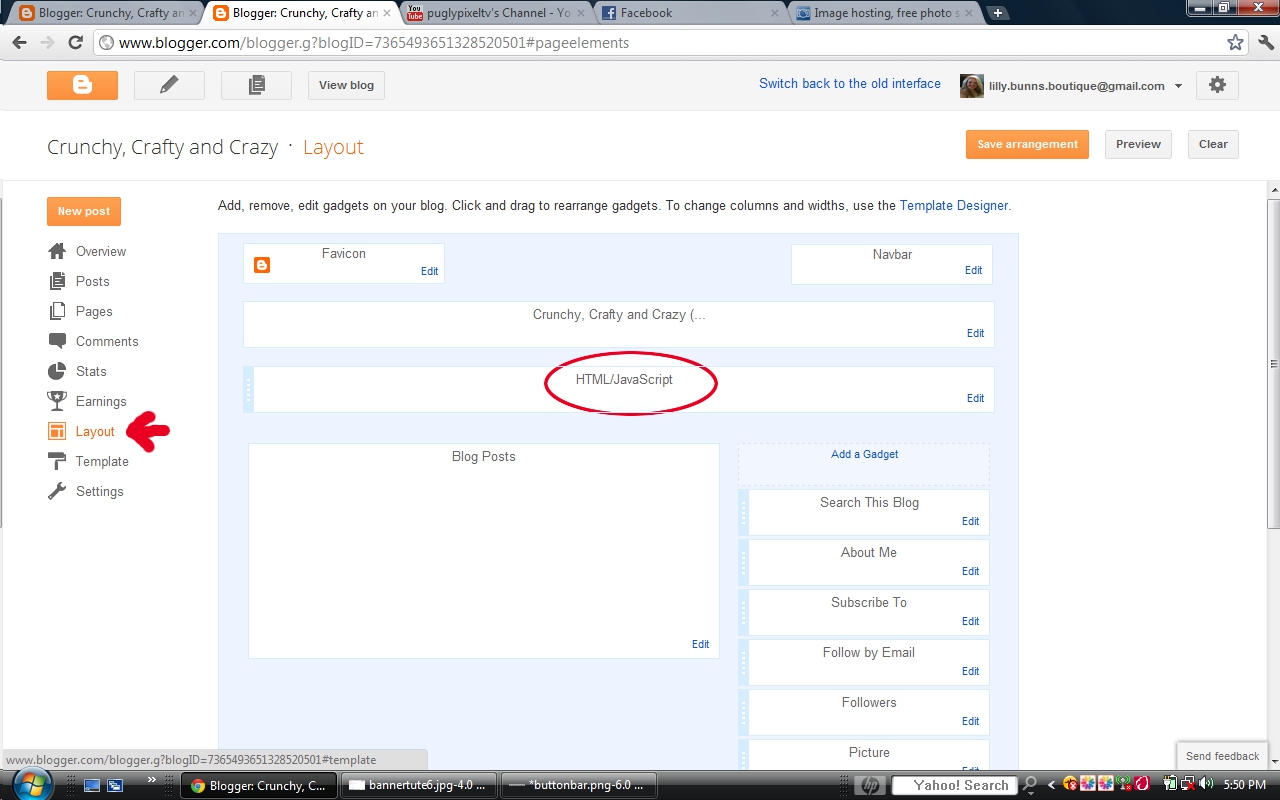
5) Next Click on the "layout" link on the left. Now choose "add a gadget" below your header. (I've circled it, though mine says html/javascript) Choose an HTML/Javascript gadget.

6) Now you'll need to do some HTML in the box that just popped up. I'm going to be generous and go ahead and give you the code. Be sure to put YOUR information where it needs to be (red words for the page link [this is why you left the "pages" opened in another tab or window], the aqua words are for the photobucket direct link). Copy and paste this code for as many pages as you have. Make sure that the pages and the photo's match. You don't want your home page to go to your about page! DO NOT PUT A TITLE!!!
<a href="your page url"><img src="link to photo that corresponds to the page"/></a>
 |
| This is what my code looks like. |
7) Now click on Save and then Preview that page to make sure it looks right. If the spaces are too wide between the button, or if you want more space, then add or take away line breaks (from hitting enter/return on the keyboard). Once you get it looking right then click on the orange "save arrangement" button.
You now have a beautiful customized tabs bar! You can also make this with just a normal looking button by just making one button (Like the buttons on the Not Just a Little Fat blog). Save the button with the appropriate text on it. All other steps are the same.
Well, I hope you find this tutorial helpful! Until next time, Happy November 1st! :) MegOri Girls Boutique
You might also like:
No comments:
Post a Comment